
As an experiment, I installed a validating recursive resolver on a home/SOHO router. I also set the router to advertise this resolver in DHCP as the DNS server for the LAN served by the router. The experiment was a resounding success — the clients on the router LAN only receive Secure or Provably Insecure DNS responses and do not receive Bogus responses.
I was able to verify this by navigating to a bogus addresses. For example, here is a screen shot of navigating to a domain with a bogus signature (http://bogussig.dnssec.tjeb.nl). If you are on a non-validating network, you will be able to resolve this link. If your network is validating, however, you should get an error if you click the link.
The HttpWatch browser plugin shows that the DNS query for this address very quickly returns an error.
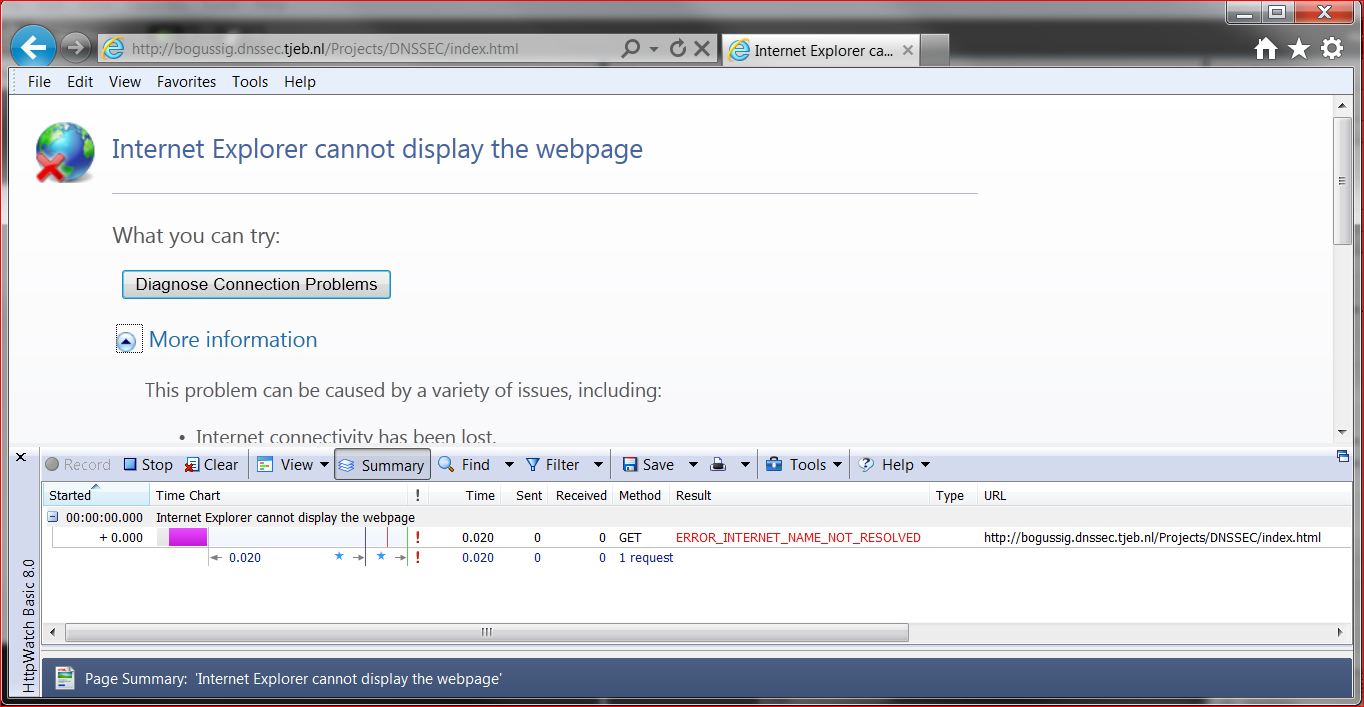
Dump of a DNS query of a domain with a bogus signature
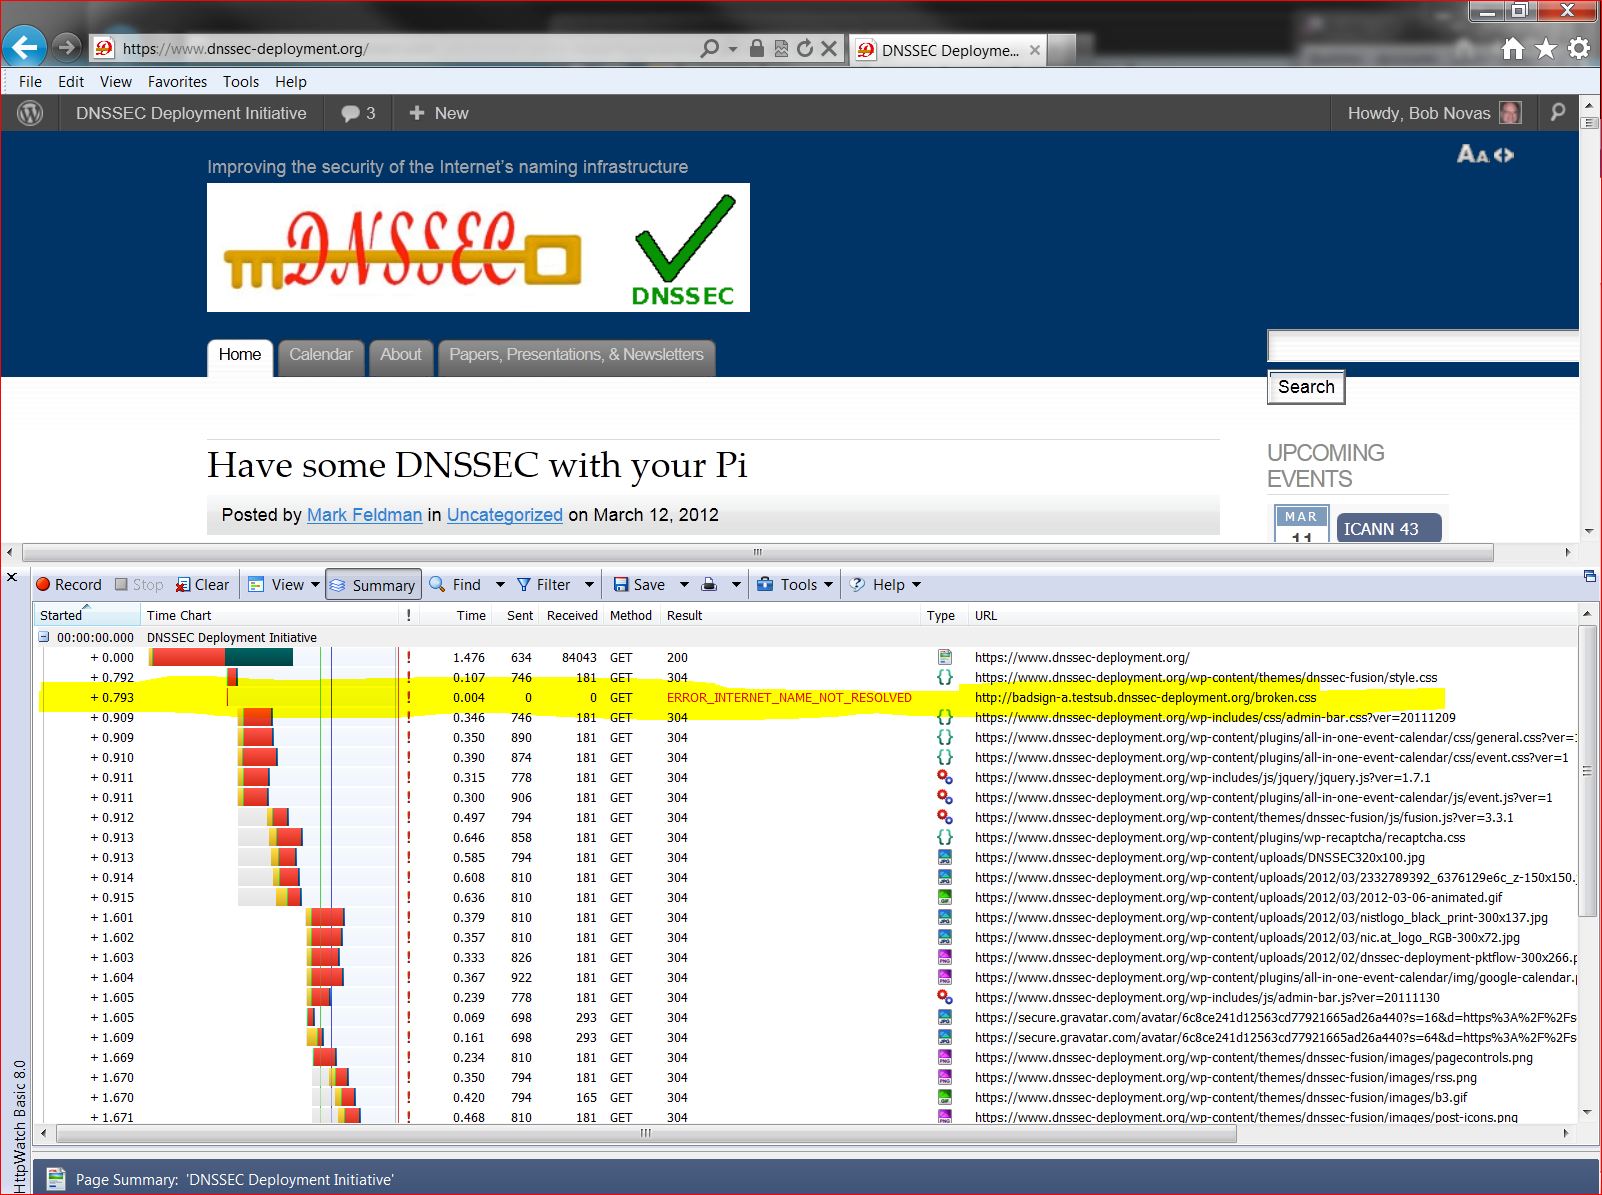
Loading a page where names are signed
So, how did I do this? I started with a Buffalo WZR-HP-G300NH v2 router, which I purchased online for just under US$70. The router runs a customized version of the DD-WRT Open Source software out of the box. The router has 32MB of NVRAM and 64MB of RAM. The basic configuration with an Unbound recursive resolver requires about 10MB of NVRAM, so this router has more than enough storage.
A few words of caution. Not all routers are suitable — you need to have a router that is supported by OpenWRT and the router needs to have enough flash memory. Also, you may lose any special features that are included in the manufacturer’s firmware. For the router I used, I lost the “movie engine” feature and the ability to support a file system on the router’s USB port. I could have loaded more packages from OpenWRT to support a file system. Finally, there is a risk that you will brick the router — i.e., turn it into a paperweight. You’ll need some level of expertise with technology and a platform that supports telnet, ssh and scp (e.g., Cygwin on Windows, or a Mac or Linux box).
Because of the greater ease of configuration that it offers, I reflashed the router with the OpenWRT router software. Then I loaded and configured Unbound, a BSD-licensed recursive resolver and was up and running.
Here are the specifics of how I accomplished this:
- I downloaded the right firmware image for the router from the OpenWRT nightly build site. For the Buffalo WZR-HP-G300NH2 router, I used this build for the squashfs file system for a system upgrade. The system upgrade is because I was going from a DD-WRT build to an OpenWRT build. Other firmware images are available for this router that are specific to other circumstances. If you are not flashing this specific router, you will need to establish the right firmware to use for yourself.
- I connected my PC to a LAN port on the router. I set the PC to use an address on the same subnet as the router – in my case 192.168.1.10 as the router is at 192.168.1.1.
- I pointed my browser at the router, set a password, and logged in to the router’s Web UI.
- I navigated to the Administration/Services page and enabled the SSH daemon. At the same time I set up the authentication for SSH.
- From a terminal window on my PC, I copied the OpenWRT firmware to the router.
scp openwrt-ar71xx-generic-wzr-hp-g300nh2-squashfs-sysupgrade.bin [email protected]:/tmp
- I then logged into the router via ssh to flash OpenWRT onto the router in place of the supplied dd-wrt:
ssh [email protected]

cd /tmp

mtd -r write openwrt-ar71xx-wrz-hp-g300nh2-squashfs-sysupgrade.bin linux
- I waited for a good long while. When the red light stopped blinking, I had successfully flashed the router. It did not yet have a Web UI, but I was able to access it using telnet.
- I used telnet to acces the router with no username or password and set a password. This should disable telnet and enable ssh with that password (username root):
telnet 192.168.1.1
set a password when prompted
- I connected an Ethernet cable from my home LAN to the router’s WAN port (you could also connect the cable directly to your cable or DSL modem).
- I ssh’d into the router and loaded and installed the router’s Web UI, called luci:
ssh [email protected]
opkg update
opkg install luci
⁄etc⁄init.d⁄uhttpd enable
⁄etc⁄init.d⁄uhttpd start
- At this point I was able to login to the router’s Web UI by pointing my browser to 192.168.1.1. On my first login, I needed to set a username and password. I found that no matter what username I set, I always needed to use the username root to login to the router via ssh. It did use the password I set, however.
- I think the best thing to do next is to move the router’s LAN subnet to another subnet. My primary subnet (i.e., the one my ISP’s router provides and the one I have plugged into the router I’m working on’s WAN port) is 192.168.1.x. I logged in to the router’s Web UI and moved the router’s LAN to 192.168.2.1. This avoid IP address conflict between the two subnets. Since my PC is plugged into the LAN port of the router, I had to change my PC’s address to something like 192.168.2.10 so it can talk to the router once it’s on 192.168.2.1.
- I then ssh’d back into the router and installed unbound (This can also be done this using the Web UI from the System/Software page). I ssh’d into the router and used opkg to install Unbound:
ssh [email protected]
opkg install unbound
- I enabled Unbound at startup by navigating a browser to the router’s System/Startup page and clicking on Unbound’s Enabled button to turn it to Disabled.
- I disabled dnsmasq’s (the default DHCP and DNS server on the router’s) DNS function by navigating the browser to the Network/DHCP and DNS/Advanced page and setting DNS Server Port to 0 (zero).
- Finally, from my ssh session, I told dnsmasq to advertise the router (unbound, really) as the DNS server in DHCP responses:
uci add_list dhcp.lan.dhcp_option="6,192.168.2.1"
uci commit dhcp
⁄etc⁄init.d⁄dnsmasq restart
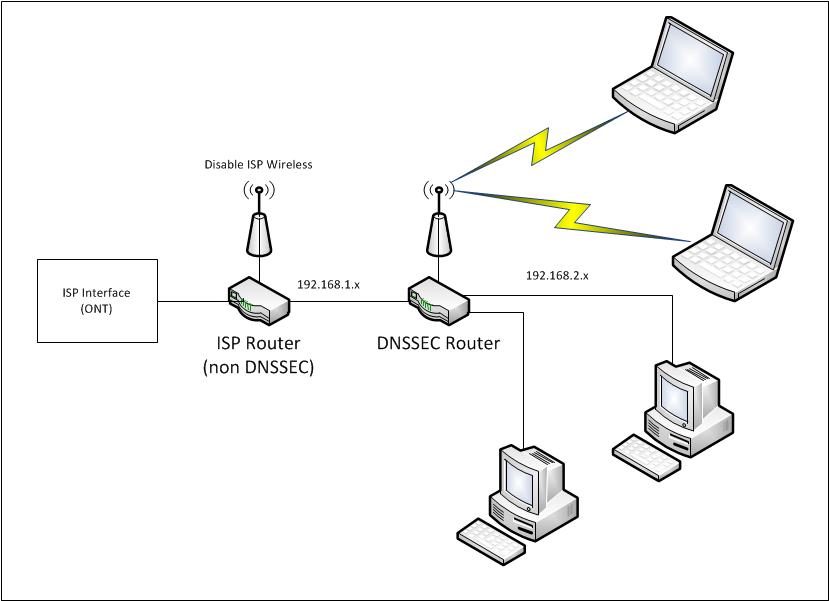
At this point, my router was up and running, dnsmasq’s DHCP was advertising the router as the DNS server, and Unbound was running as a recursive resolver on the router. All computers I put on the 192.168.2.1 router’s LAN that auto-configure using DHCP used this router’s unbound resolver for DNS, and are protected by DNSSEC. My network is configured as shown in the figure below.
One thing we noticed after running the router for a few days — be sure to leave NTP running on the router. In our case, we turned NTP off for some debugging and forgot to turn it back on (NTP is on the OpenWRT System/System page, under “Enable buildin NTP Server”.) After a few days, the router’s time was far enough off to cause validation to fail. Time is important for validation to work correctly because DNSSEC signatures have inception and expiration times.
We plan on doing some benchmarking of Unbound’s performance on this platform and on doing similar experiments with other routers. Email us at info @ dnssec-deployment.org with your experience doing this or any questions or feedback.
Recent Comments